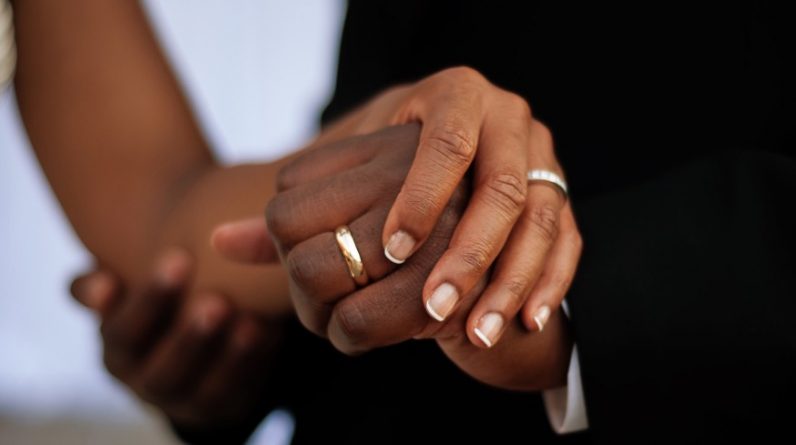
in today's video we are tackling
all things wedding inspired diys we've got your place settings
we've got your wedding backdrops and we've got a seating chart
that also doubles as a guest book if any of this sounds exciting i can't wait to
show you and also give us a subscribe! let's go hi guys welcome back to our channel it is now
summer and i feel like this is peak wedding season so i am really excited to do some wedding diys
with you guys today it's been a while since i've really thought about what's trending for a wedding
it's been a couple years since i had my own wedding where i did a bunch of diys for that so to
help me out i asked you guys over on our instagram to send me some photos of things you were looking
to diy for your wedding things you were inspired by this wedding season and i pulled a bunch of my
favorite photos and i'm going to try and do my own diy representation of those things for you today
and of course doing it all with a budget mindset and using as many thrifted things as possible
because those are just my two favorite ways to diy and before we get into it i want to give a big
thank you to instax for sponsoring this video first up we have this photo here which is this
really nice table setting it's like the plates and the napkins and the menu and i love how
the napkin in the menu is all this really nice bundle on the plate and i want to figure out
how to diy this but also take it a step further because i have this idea in mind that combines
this but also makes it like a place card so you can label each seat so people know where to sit um
at the table but also it's still got your napkin and your menu and it just looks so pretty let's
get into how i'm gonna diy it so we're gonna go ahead and start with the paper card of this table
setting i've gone ahead and mocked up my own menu for this wedding that we're having together you
can access it on our blog linked below and you can edit it put in whatever um food you are serving at
this event but you could of course also just make your own in microsoft word or photoshop whatever
you like to use and print it out the paper i'm using today is this really nice card stock that
has almost this linen texture on it this came just from the craft store but you can of course
use whatever paper whatever texture whatever color fits the theme of your wedding so i'm just gonna
use some regular scissors and cut out this menu if you're using my menu template you might notice
there's four little tiny tick marks on the bottom half which you can see me notching out with an
x-acto knife the reason that we have that space there is the perfect segue for today's sponsor
which is in stacks because i'm going to be using an instax photo in here if you don't know instax
products and film are so perfect for weddings and wedding diys for this diy i'm going to be using
the instax link wide printer this is really cool because you can actually print out your photos
ahead of time instead of having to take them on the spot with a camera this offers a really great
opportunity to provide guests with tangible photo memories that they can take home after the wedding
so i'm going to be using the instax link wide printer to print out photos that i have of me and
my guests assuming this is my wedding of memories that we have together and then using the app i'm
gonna add their name on top of the photo that we have together to work as the place card cute
right i literally think this is such a good idea this is how the little menu slash place card combo
is looking right now it's so adorable we still have more work to do to complete this to make
it look like our inspiration photo it's missing a napkin and a really nice bow tie of course you
could purchase fabric napkins or rent them from your wedding hall or whatever you're doing but
because it's me we're gonna do a diy shelve and because it's doubling me i wanted to know
if this was thriftable by any means at all so i went out to the thrift store to look at
fabric options and turns out there are so many good linen options in the curtain section of the
thrift store lots of curtains are made of really heavy linen and there's a lot of fabric to play
from there especially in kind of like the beigey cream color palette it's not really where i
would think to go to get good linen fabric but i was surprised there was tons of good
options there so that's just a hot tip for you at home but i happen to have some scrap
material here because we diy things a lot and our fabric bin is overflowing so i'm going to be using
just this white linen material to make my napkin out of today and then i've got this i don't
know what material this is it's really like a silky but it's not silk really beautiful pinky
beige material that i'm going to use as my bow i just think any sort of like really beautiful
fabric just lends itself to being wedding-y so much you can really get away with a lot
of different options here my fabric needed a little bit of ironing since there were some
wrinkles and then i'm just cutting them down to whatever i feel like is appropriate napkin
size now i really like the way that the edging on this linen frays naturally as well as the
chiffon material i'm using for the bow but if you don't like the natural fraying of your
material you can of course go ahead and hem all of these pieces that you're cutting out now it
is time to assemble so i'm just taking my napkin folding it up to be about the width of the menu
card we printed out then stacking the menu on top and taking my fabric bow and wrapping that
around with a really nice knot on the corner here i really like how in the original photo there's
this nice flower cutting on the place setting as well so i'm going to take some inspo from that and
also add a flower element to my place card here luckily i'm surrounded by beautiful floral
arrangements today so i'm going to use some of just the dried flowers that we have here um got
some little bunny tails some i don't know what these little yellow ones are but they're a really
nice mustard color and i'm just gonna pop them in behind where the instax photo is sitting and that
should hold them in place beautifully and tata oh my gosh this is this is
cute this is really cute that took me no time at all it cost almost
no money as well which is a huge win for us let's move on to the next wedding diy all right
next up we're tackling a big one i had a lot of photos sent to me of wedding backdrops or things
to stand in front of for your wedding a lot of the recurring themes i've seen are like this arch
shape type structure and also this big circle ring shape which is really beautiful i'm going to do a
combination of the two of them today i'm going to show you how you can make a giant arch shape and
then fill it with lots of really cool flowers like the ones we have here around i think it's going
to be so easy to do and look really really awesome we're going to start by building a base for this
because we want it to be really sturdy and not fall over i'm gonna be using this two inch by
two inch pine lumber piece to build essentially a giant h-shape that will be like the most sturdy
base that we can give this thing this is gonna be built out of one long piece and two shorter pieces
i'm gonna list the exact dimensions and steps on our blog which you can check out linked below all
right let's start by making some simple cuts in this wood i'm using a measuring tape and a pencil
to mark out exactly how long i want that long and two short pieces to be and then i'm using a table
saw to just cut that these pieces of wood are so small that they're easily cut with a handsaw as
well if you don't want to use a power saw for this now to assemble the base frame i'm
using some wood glue and some long deck screws to screw my short pieces in to
the side of my long pieces from both ends making sure to start with some wood glue
so that it's really held together solid all right now it's time to build the arch shape to
this backdrop to start i'm going to be using two wooden dowels these are 48 inches in length and
they are in the size 5 8.
To attach these into the base i've already made i'm going to be using
a spade bit that is 5 8 as well drilling in a hole in the center of the sides of the h and that's
gonna be where i can slot in my two wooden dowels i've moved to the floor because this project
is now getting very large but the base is done looking good now to actually make the arch
shape of that i'm going to build that out of a material called pex pipe this is a 10 foot
length three quarter inch in diameter again we'll link everything on the blog for you this
is actually pretty affordable you can find it in like the plumbing aisle of the hardware store
and you guys are gonna die at how simple this is to make okay because we've used the right size
dowel to fit in the pipe put it together like so oh we have an arch are you kidding so good you can adjust the height of it based on where
it sits on the dowels and then i cover the rest of the exposed wooden dowel and to stop
this from sliding around i'm going to cut two more pieces out of another 10 foot piece
and put them over the exposed wood dowel okay the arch is now assembled which
is so exciting you could add more glue into these parts if you want to but as you
can see it's holding together really well and the best part about not doing glue is that
you can take this apart to transport it which makes it really easy to get to a wedding venue now
we're on to painting it which of course you can do whatever color you want i'm going to do a mix of
gold and bronze spray paint and for the base you could also paint it like a green to blend in with
the grass or if it's on some sand leave it natural do whatever works for you i'm gonna go outside
though because we don't spray paint inside usually all right now we're on to styling this with
all of our florals so to start i'm using two pieces of this floral foam and then wrapping them
around the base of the arch with some floral wire once the foam blocks are secured to the
base it's literally as simple as just stuffing the florals into the foam blocks
if you have taller or heavier florals you could also support those directly to the
pipe with some of the floral wire as well but the smaller pieces should have no problem
just sitting in the phone on their own last up we have this photo that was sent
to me this is a beautiful wedding seating chart and it's made out of all picture
frames with some great dried florals in it some really nice paint marker going on i want
to show you how i would kind of do this take on a picture frame seating chart but also i have
a really cool diy twist in mind using the instax mini 11 that's going to turn this seating chart
into a great guest book at the end to begin we need a picture frame i'm gonna do it out of one
really big picture frame but you could apply this same diy concept to a bunch of little frames
like the inspo photo so to pick up my frame i headed to the thrift store which of course always
has so many good frames for a really good price this is the one i ended up finding
conveniently it actually has some framed photos of dried flowers which was
like not intentional at all maybe there's a way i can dissect this and use some of this for the
actual seating chart but that's besides the point the point is that this is one of these really
fun picture frames that's so well constructed it might be a bit tricky for me to take it apart
but that's what my challenge is right now with my picture frame disassembled there actually
is conveniently this perfect size of white poster board in the back i'm going to use that
to build my new seating chart on because it's a really great base i don't have to cut a new piece
i remember these being blue as a kid do you know is this a mandela effect wait
you guys remember this color yeah i distinctly really being under my nails
like playing with blue i remember it like this blue like blue no yeah okay see
this color blue no this isn't familiar what and that doesn't even make sense because
i think you're older than me and you're younger than me so like it's not like it's a age thing so
to cover it i'm gonna use some craft paper i just think that's gonna offer a really nice contrast
to the name tags i'm gonna put on after now for the name tags this is another template that i went
ahead and made that you can get on our website linked below this is everyone's name um put into
tiny little instax like cards you'll see why this matters later but yeah i'm printing this on a
similar linen card stock paper that i showed again earlier because it's just so pretty i like
it and with this printed out i'm now going to cut it all up so i have a little instax sized name
tag for each one of my guests and once those have been cut out i'm going to space them out
and glue them onto the back of the picture frame so this is how it's looking so far and if you
have more people than fits on the board you can always do more than one picture frame
like the original one had i think a frame per table which is really cute speaking of the
original inspo photo it had a lot of really nice pressed dried florals on there as well as some
beautiful script work i'm gonna do my best to attempt something similar i did leave space above
each row to add my table number and then even more space on the top to add the label that this is
in fact a seating chart so let's get to that let's make this look a little cuter freehanding
calligraphy can definitely be tricky sometimes so there is literally no shame in just copying a
reference photo or copying a font that you like that way you can make sure you're getting
the strokes thick where they need to be and thin where they need to be to really get that
hand calligraphy look these pressed flowers are actually just faux flowers from the craft store
and i'm gluing them down with some craft glue now it's time to put this frame back together
if you remember when it came apart it had these really fancy staples in it i'm gonna attempt
a finishing nail and hammer combo and be very careful so i don't break the glass they definitely
do make framing staple guns that put in staples sideways which you could invest in if your frame
came apart the way mine did okay so you might be wondering why we made all of the name cards in the
shape of little instax photos that's because this is a two for one diy project not only do you get
an amazing seating chart but this is going to turn into a guest book when the night is done and i'll
tell you how felt like i'm on like an infomercial but wait there's more let me show you this little
guy is the instax mini 11.
It's a super compact and user-friendly camera and the best part about
it is that you can take pictures and get them on the spot so you can take photos of your guests
memories from the wedding and literally look at them instantly i've used this exact camera at
my wedding i know lots of friends who've used this camera at their wedding and it's a great way
to create a guest book of all the photos taken of your guests after the wedding but sometimes the
tricky part is making sure that you actually end up with a photo of everyone who comes to your
event hence our seating chart is the perfect way we're gonna have guests cover their names with
photos of themselves throughout the night the best way is if you see a blank spot go snap a photo
of that person and voila your guest book is full and the great part is after the wedding this
whole frame full of photos and memories can be instantly repurposed as home decor in your home
if you want to learn more ways to personalize your wedding with instax you can check out
the link in the description box instead of just telling you guys how great this actually
would work at a wedding i think it's better that we actually head outside and have a little
wedding of our own and i'll show you how it's done and that's it i hope you guys enjoyed
these wedding inspired diys i want to give a big thank you to everyone who submitted
your inspiration photos i hope i did them justice and also i want to give a big thank
you to instax for being today's sponsor if you want to know more ways to personalize your
own wedding with instax you can check out the link in the description box one thing that we didn't
get to category wise in today's video is wedding invitations so if you want to see how i made
my own personal wedding invitations i'm gonna point you to this video that you can watch at the
end here because i still love how i did them years later they turned out good okay so i wanted
to bring you guys on a little adventure with me because i wasn't sure exactly how they were
going to turn out i didn't know what i wanted so the base of these invitations are made
out of watercolor paper because i love the texture of watercolor paper and i know that
i want to add a colored effect to the pages