Welcome to Make Something with me, David Picciuto and today I'm going to
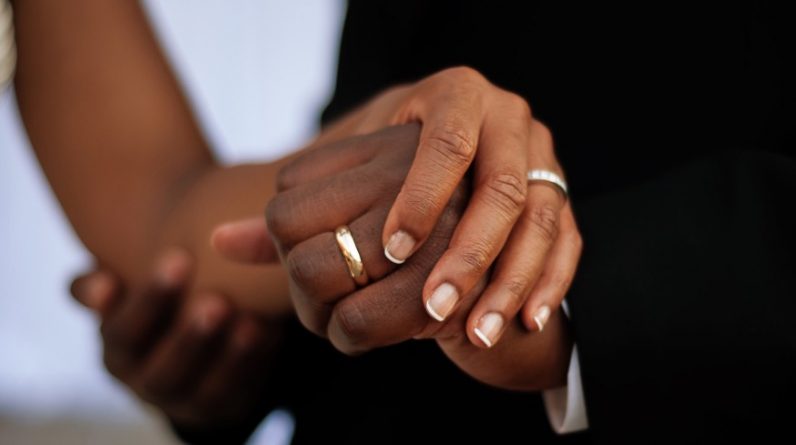
show you how to make these beautiful wood and copper wedding rings. Check it! Today's video is brought
to you by safe shark. We're going to talk more about their
outstanding privacy service later on. Every year, Kelly and I, we retire our wedding rings and make new
ones and today we're going to work on pair number six.
I do have a video on the making of last
year's rings as well as all the previous years. I'll have a card up top that
you can click on for that playlist. Last year we use this copper insert and
this year we're going to do the same thing again except a new
design on the outside. These are 88 cent copper
couplings from the home center. They are meant to fit over half
inch pipe, a little bit too small, but we're going to stretch
them in a little bit. To cut them I'm going to use this pipe
cutter.
You stick your pipe in there, you tighten that down just barely. You rotate that around and that scores
it and then you tighten it a little bit more. We rotate it another turn
and you just keep doing that. And I remember cutting off about three
eighths of an inch and there you go. So now that we have the
copper couplings cut, next thing to do is stretch it to size. I have this ring stretcher right here
and this has like seven or eight segments and as you pull up on the
handle, those segments expand. And on the side here
it has the ring sizes.
So you can basically throw on your copper, do one of these numbers until
it stretches to the proper size. We are going to sand the inside, but then we're also going to
coat the inside with epoxy. So that's pretty close. So
we'll do it one more time. Kelly and I are about the same size. So the next thing I need
to do is sand the outside. Having it on the stretcher kind of gave
it this concave shape on the outside ring. So I'm going to just
Chuck up a doll. In my drill press. And then
that doesn't fit on there, but we'll wrap it with tape until it does.
Drill, well. You press the button, get your head in the game.
Dan, will this work? Yes, Got a nice even surface. Those are done. Now it's time to make the wood part. I went to Kencraft and I got some zebra
wood, some soft maple and some Ebony. The most of the ring is going to be the
zebrawood and I actually want the pull out a piece this way.
So the rings on there, wrap around the ring like like
that. Does that make sense Dan? So I want to find a good spot that has
some really good contrast and I probably need 12 inches or so. Going to glue three pieces
together. So it's one long piece, but as you can see I need
to clean up the edges.
The zebra wood here and they're
going to glue together like that. I'm going to have a really thin
strip of maple on both sides of that, so I need to cut a really thin strip
off of this. We're going to do that. At the table saw and then sandwich
that with two thin strips of this Ebony I'll show you what I was
doing with the feather board, I was not using it as a feather board. I was using it because I don't want to
cut this thin strip between the blade and the fence. I want it on
the outside of the blade, so I would register this
board up against that stop. Then I could run this
through, cut that off, and then again register this board up
against that stop and cut the through and then I could get even thin strips
without having that pinch between the blade and the fence.
So this is just just a reference or
we got the zebra wood in the middle, what the grain going this way. Then a little strip of maple and
then the thin strip of Ebony. Before I glue all these together, I'm just going to CA glue these three
pieces together so they cooperate during the glue up. You think it's funny, Dan. That should do it. We'll let
that dry for about an hour or so. We're going to cut this down and then
try to get a nice little smooth edge on there so we can hand plane
some shavings for the ring. So I'm just going to throw this
in the bench vise.
Clamp that up. We just sharpen the plane. Hopefully
we can get some good shavings here. A little bit thicker shavings
so it doesn't fall apart. And I've tried pushing and pulling
just to see what works best. Get out of there. That's, that's a good one right
there. I don't need the full length. I only need to wrap around
the ring like three times. So like that's probably good.
Time to glue it onto the copper.
I'm just going to get it started. I just wanted to sand the edge
there. So when it wraps around, you don't see where it, where it started. The tough part is like not gluing your
finger in there cause I do that every year. We'll just wrap that around. I've learned a good lesson wrapping
my finger and packing tape so the glue doesn't stick to me
and it's working. Okay. Chuck this back up on the drill
for some final sanding and shaping. I want a nice little, you
know what I'm saying? A little Before I show you how freaking
cool these rings came out. I want to tell you about a VPN service.
I've been using Surfshark
as a full fledged security
tools set based on virtual private network architecture,
blah, blah, blah, blah, right? You've heard this all before, but
here's the thing is look at this. Boom, you turn it on with one click. You can then change where you want
your "computer" to be located. Super easy to use and absolutely no diving
into system settings or preferences, not only for your desktop, but also
your mobile devices and blocks, ads, trackers, malware and phishing
attempts, and unlike other VPN services, you can use it on as many devices
as you want simultaneously. Because it blocks ads and trackers. It's going to save you on roaming data
and your websites are going to load faster. Surfshark protection from data thieves
who are trying to steal your passwords and credit card information while using
public wifi. Here's the cool thing. Have you ever been traveling and not been
able to access your HBO or Netflix or your sporting events because
you're not in the region.
Surfsharklets you choose a virtual
region so you can regain access. Or if you're at home and you want to see
what streaming services are offering to other countries, you can do that to. Click on the link in the description
or go to Surfshark.Deals slash make something and use my promo code. Make something to sign up for 83%
off and one extra month for free. I want you to try Surfshark with
my exclusive limited time deal. Thank you Surfshark. Now let's get back to these
rings and see how they came out. These definitely are my favorite ones
yet for a finish I use a high gloss spray acrylic and then on the inside I use a
jeweler's epoxy to keep the copper from turning my fingers green.
Although last year I used the same
stuff and we had to reapply it, so I don't know if I didn't put enough
coats on it or if it just doesn't work that well. So we'll see. This year. I want to give a huge shout out to
Kencraft for supplying the zebra wood, maple and Ebony for this project. Check
them out at KencraftCompany.com also, I have all of these beautiful shavings
leftover that I don't know what to do with, so I'm going to give them away to the
first person to mention the name of my podcast down below and
I will mail them to you.
It doesn't matter where
you live in the world. That is your reward for hitting that
notification bell and listening to my podcast. Thank you for watching. Next week I'm going to show you
how to make your own inlay banding, which is going to take your
woodworking to the next level. We came up with some really cool designs
and I cannot wait to show you that video.
That isn't my friends. As always
be safe, have fun, stay passionate, and make something..